How To Make A Ninja Star - Easy Origami Tutorial
Ever thought about crafting your own ninja star? It's easier than you might think. With just a couple of sheets of paper and some basic folding skills, you can create your very own paper shuriken. This traditional Japanese weapon, often referred to as a throwing star, is not only a blast to fold but also a great way to spend some quality time. Whether you're a fan of ninjas, paper crafts, or just looking for something fun to do, this guide will show you how to make a ninja star step by step.
Now, before we get started, let me tell you a little secret. This project is great for beginners and doesn't require any fancy tools. All you need is some square paper and a bit of patience. By the end, you'll have a sharp and stylish ninja star that's perfect for decoration or just plain old fun. So, gather your materials and let's get folding!
In fact, making a paper ninja star isn't just about creating a cool craft. It's also a fantastic way to enhance your hand-eye coordination and practice precision. Plus, once you’ve mastered the art of folding a ninja star, you can experiment with different colors and designs. Who knows, maybe you'll end up with a whole collection of these paper weapons. Let's dive right into it and see how it’s done.
Table of Contents
- How to Choose the Right Paper for Making a Ninja Star
- How to Start the Folding Process - Making the Center Crease
- What Are the Steps to Assemble the Ninja Star?
- Can You Customize Your Ninja Star?
- How to Make a Ninja Star - Step-by-Step Guide
- Troubleshooting Common Issues When Making a Ninja Star
- How to Throw Your Paper Ninja Star Safely
- Final Thoughts - Fun Facts About Ninja Stars
How to Choose the Right Paper for Making a Ninja Star
Alright, let’s start with the basics. The type of paper you choose can make a big difference in how your ninja star turns out. Ideally, you want to use origami paper, which is lightweight and easy to fold. However, if you don’t have origami paper on hand, you can use regular printer paper as long as you cut it into perfect squares. The size of the paper will determine the size of your ninja star, so think about how big or small you want it to be. For beginners, a medium-sized square, around 6 inches, works really well. So, what’s the best choice for you? It’s all about experimenting and seeing what feels right.
How to Start the Folding Process - Making the Center Crease
Now that you’ve got your paper ready, it’s time to start folding. The first step is to create a center crease. Take one of your paper strips and fold it in half horizontally. Make sure the crease is nice and sharp, then unfold it. This crease will act as your guide for the rest of the folds. It's almost like drawing a map on your paper, helping you know exactly where to go next. Once you’ve done this with both sheets, you’re ready to move on to the next step. Simple, right?
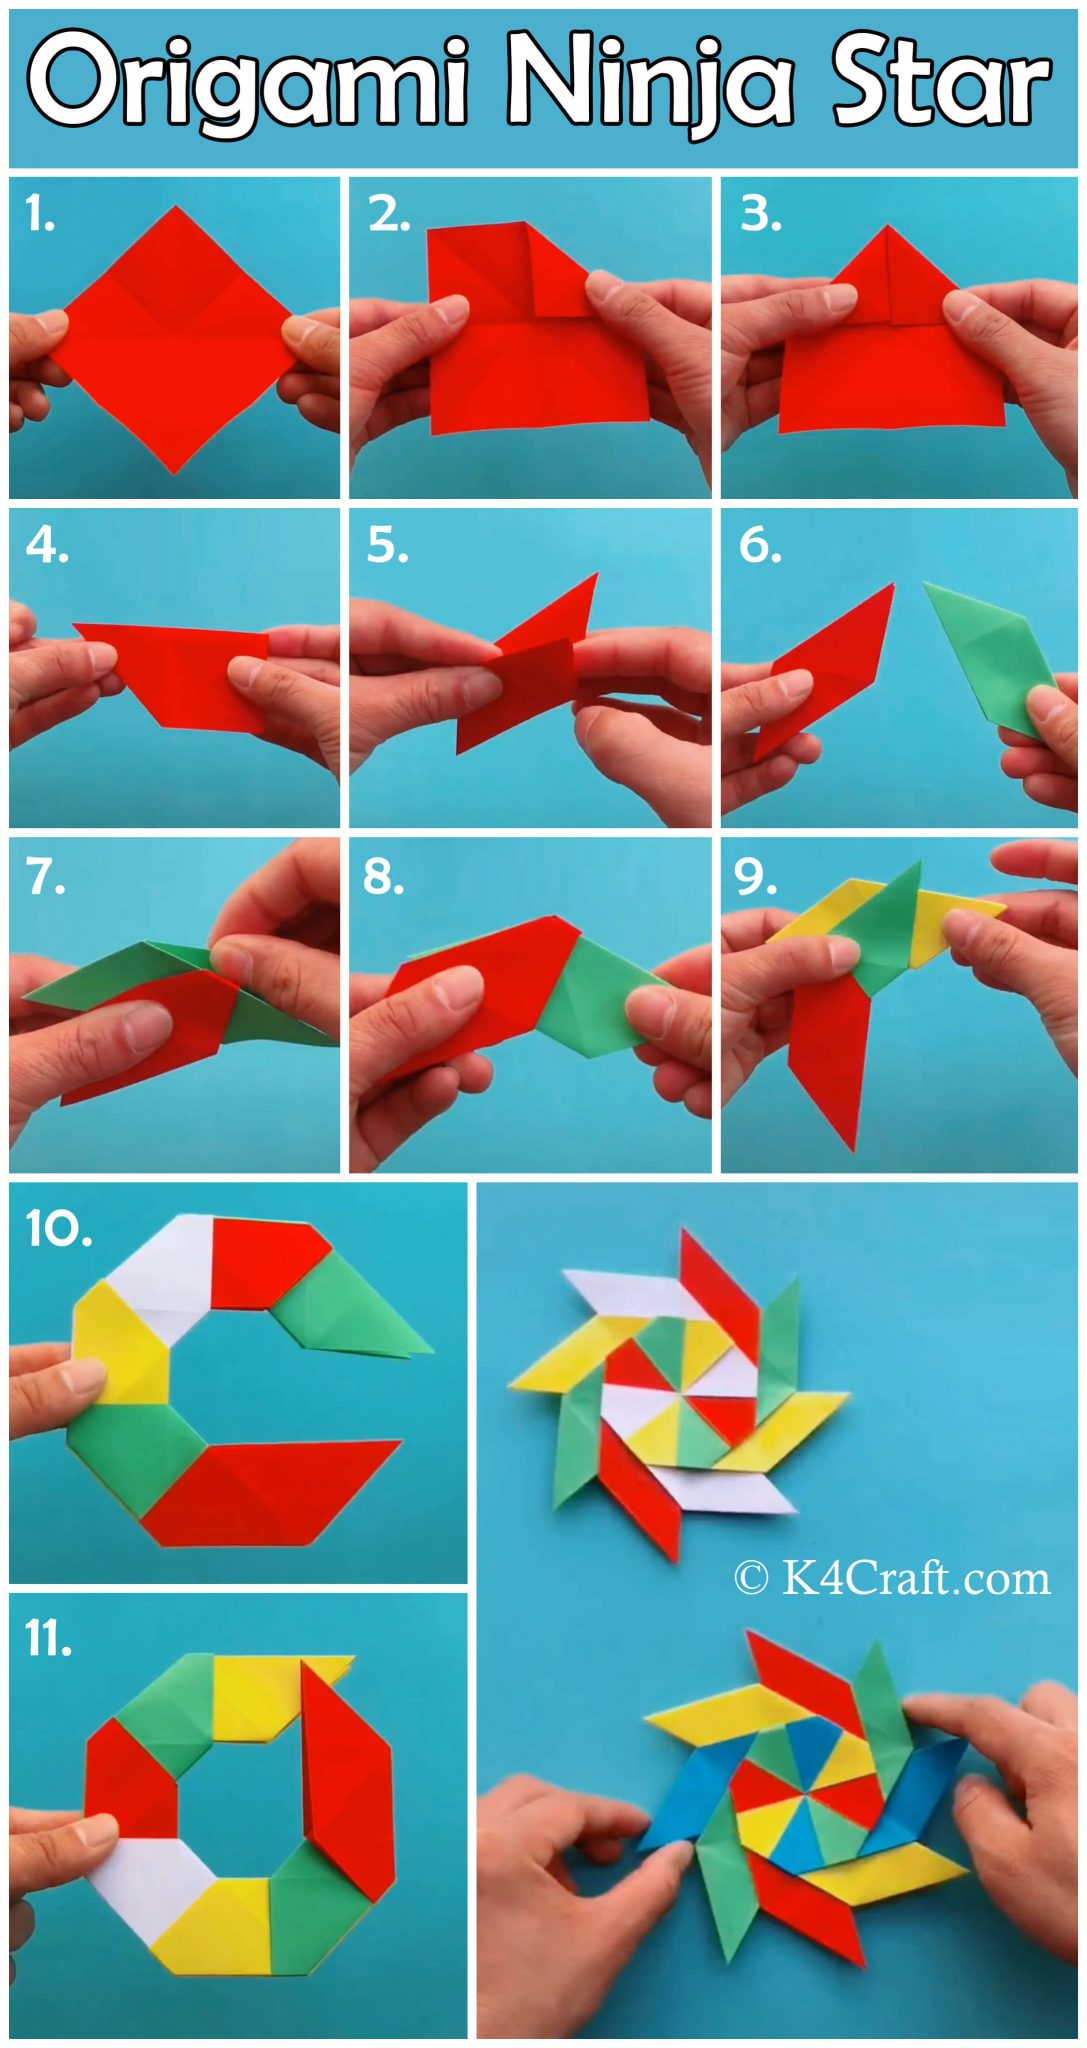
What Are the Steps to Assemble the Ninja Star?
At this point, you’ve got two perfectly creased sheets of paper. The next step is where things start to get a little more interesting. Take one of the sheets and fold the top of the paper down to meet the bottom. Once again, make sure that crease is strong and then unfold it. Now, flip the paper over and repeat the process with the other sheet. This is the foundation for your ninja star. It might seem a bit repetitive, but trust me, these folds are crucial for getting that perfect shape. So, take your time and do it right.
Can You Customize Your Ninja Star?
Of course, you can! Once you’ve mastered the basic folding technique, there’s no reason why you can’t get a little creative. Try using different colors or patterns on your paper. You could even add some glitter or stickers to give your ninja star a unique look. The possibilities are endless, and the best part is that it’s all up to you. Just remember, if you’re planning to throw your ninja star, be mindful of the sharp corners. Safety first, folks!
How to Make a Ninja Star - Step-by-Step Guide
Let’s break down the process into simple steps. First, you need to fold the paper in half horizontally and make that center crease. Then, fold the top of the paper down to meet the bottom and crease it again. Repeat this step on both sheets of paper. Now, you’re ready to start assembling your ninja star. Take one of the sheets and flip it over. Rotate the other sheet 90 degrees counter-clockwise. Place the second sheet on top of the first one, aligning the creases. Now comes the tricky part – folding the edges into the center. It might take a bit of practice, but you’ll get the hang of it.
Once you’ve folded the edges, tuck the ends of one sheet into the pockets created by the other sheet. This is what holds the ninja star together. Now, all that’s left to do is to fold the remaining flaps into the pockets and you’ve got yourself a ninja star. Pretty cool, huh? Don’t worry if it doesn’t look perfect the first time – practice makes perfect. Just a little patience and persistence, and you’ll be folding ninja stars like a pro in no time.
Troubleshooting Common Issues When Making a Ninja Star
So, you’ve followed the steps, but something doesn’t look quite right. Don’t worry, it happens to the best of us. One common issue is that the folds aren’t sharp enough, which can make the ninja star look a bit messy. To fix this, use your fingernail or a bone folder to press down on the creases. Another problem could be that the sheets aren’t aligning properly. Double-check that the creases are matching up and adjust if necessary. If you’re still having trouble, leave a comment, and I’ll be happy to help you out. It’s all about trial and error, so keep trying!
How to Throw Your Paper Ninja Star Safely
Now that you’ve made your ninja star, it’s time to put it to the test. Throwing a paper ninja star can be a lot of fun, but it’s important to do it safely. Remember, the corners are sharp, so avoid throwing it at people or animals. Instead, find a soft target like a cushion or a wall. To throw it, hold the ninja star by one of the points and flick your wrist. It should glide smoothly through the air, much like a real shuriken. Practice in a safe space and have fun experimenting with different throwing techniques.
Final Thoughts - Fun Facts About Ninja Stars
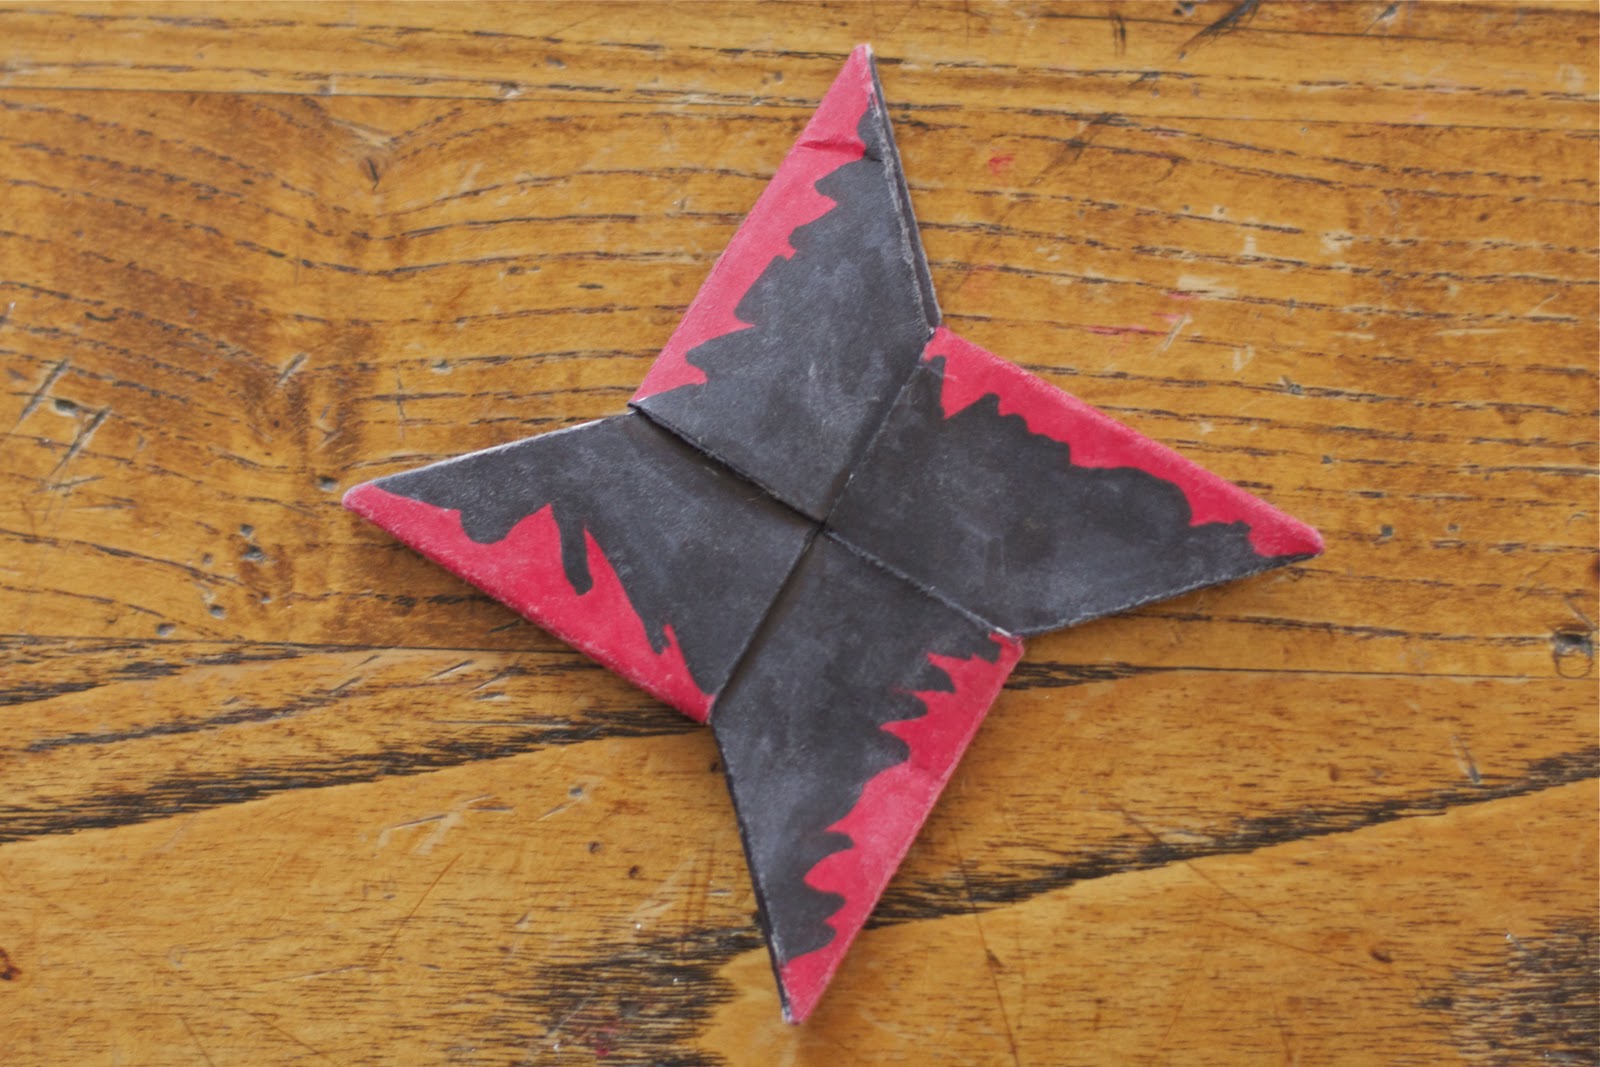
Did you know that ninja stars, or shurikens, were originally used by ninjas in feudal Japan as a throwing weapon? They come in various shapes and sizes, but the most common ones have four or six points. Interestingly, the design of the shuriken was meant to cause maximum damage with minimal effort. Nowadays, paper ninja stars are more of a fun craft project than a weapon, but they still carry that same sense of excitement and intrigue. So, whether you’re crafting for fun or trying to channel your inner ninja, making a paper ninja star is a great way to pass the time.
To recap, making a paper ninja star is an easy and enjoyable project that anyone can do. All you need is some square paper, a bit of patience, and a willingness to learn. By following the steps outlined in this guide, you can create your very own ninja star in no time. Plus, with a little creativity, you can customize it to make it truly unique. So, grab your materials and get folding – who knows, you might just discover a new hobby!
How To Make 8 Pointed Transforming Ninja Star - Step by Step Origami
How To Make A Ninja Star

Origami Ninja Stars Tutorial
